If you want to know the right way of testing amplifier with multimeter, you are at the right place!
Amplifiers boost the voltage of an audio signal, making it powerful enough to drive large speakers and subwoofers. If you’re new to car audio, testing your Amplifier for underlying problems without proper guidance may cause more harm than good.
This writing explains how to use a multimeter to test a car amplifier. However, before you begin testing, you should be familiar with the multimeter used to test your car amplifier.
- What is Multimeter?
- How to test Amplifier with a Multimeter?
- Step by Step Guide
- Configure your Multimeter
- Find Amplifier’s Location
- Set Multimeter
- Examine the protection mode
- Check the output frequency
- Check the Instability
- Test the Signals
- Use Multimeter
- Problems with the Amplifier
- The Amplifier does not turn on
- The Amplifier is in protection mode
- The Amplifier is turned on but has no output.
- Distorted output
- The output of the Amplifier is low.
- The Amp has erratic power
- How to fix an amplifier?
- Conclusion
What is Multimeter?

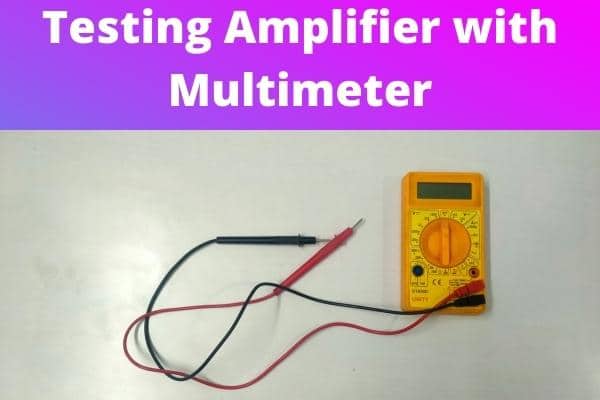
A multimeter is a piece of electronic equipment used to measure voltage, amps, and resistance across circuits. Professionals can use multimeters to detect levels of voltage and resistance and changes in electrical currents by connecting two leads to different parts of an electrical system.
Multimeters have a wide range of applications in information technology. Hardware troubleshooting uses a multimeter to determine whether individual hardware devices are receiving enough current or whether anything has changed in an existing IT setup.
Many people associate the multimeter with a residential or commercial electrician’s toolbox. And this instrument can also be used by IT professionals to diagnose energy supply issues in advanced data systems. In today’s world, digital multimeters are more commonly used than analog multimeters because they are easier to use and display results in digits. It also aids in reducing errors when reading the results.
How to test Amplifier with a Multimeter?
Before using a multimeter to test your car amplifier, you should know how a multimeter works. There are two types of leads that come with a digital multimeter.
It’s red and black. Connect the red lead to the voltage, current, or resistance, and treat it as a positive (+) terminal. While the black lead is connected to the common or ground port, it is a negative (-) connection. The multimeter also has probes for holding the tested connections. Some tips are primarily used to provide a connection point.
Using a multimeter to test car amplifiers is not a difficult task. Most of the time, your Amplifier’s connections are correct, but it still does not work. If you want to check the amperage, you can test it to see if it is working properly. To properly test your car amplifier, you should use a multimeter.
You must first configure your car’s Amplifier before testing it with a multimeter. It entails rating the meter based on the number of amperes that will typically pass through the circuit. You must perform the following steps to configure the multimeter:
Multimeters are typically divided into two sections: voltage direct current (VDC) and voltage alternating current (VAC) (VAC). A-VAC combination tests appliances powered by your home’s power supply. When testing a car’s Amplifier, the Amplifier must be set to VDC mode.
Connect the black wire with the common circuit, and the red wire is plugged into the socket labeled A. You must now set the given amperage setting based on your socket. It is accomplished by rotating the central dial.
Step by Step Guide
Configure your Multimeter
Even if you’re new to using a multimeter, it’s not difficult to set it up. The black probe must return a negative result. The red one goes into the socket labeled A. The letter A stands for amperage. There are two separate sockets, one of which is more responsive and the other is high-amp. If you’re unsure which port to try, try the one with the highest ranking.
Set the central dial of the multimeter to the amperage setting that corresponds to the socket. There is a chance that these settings will appear differently, but they will still mean the same thing. You may find A and mA options on either the Amp or the multimeter, but only one A setting may be found.
Find Amplifier’s Location
If you are testing factory-installed amplifiers, as is common in most scenarios, cars come with preinstalled amplifiers, the location of which varies depending on the car model or company.
Locate the Amplifier’s mounting location. Car amplifiers can be found behind the seats, on the dashboard, or elsewhere. The owner’s manual will direct you to the precise location of your built-in Amplifier.
Set Multimeter
Set the multimeter’s rotator dial to the amperage setting closest to the socket. There is a chance that these settings appear different, but they imply the same thing.
For example, the Amp and multimeter may have A and mA settings, but the dial may only have one A selector. If you’re still unsure, consult the manual.
Examine the protection mode
An amplifier, like a computer, has a protection mode and a shutdown state. Your Amplifier enters a protection mode to protect it from further damage, even if it is annoying.
An amplifier enters protection mode due to incorrect installation, faulty wiring connections, or an internal defect. As a result, you must test the Amplifier by disconnecting all connections and turning it on. There is a problem if the protection mode is enabled.
Connect an amplifier to the multimeter and examine the voltage coming from the wires connected to the car amplifier to check for wiring problems.
Check the output frequency
Check the output frequency by inserting the multimeter wire into the output channel. Check the multimeter reading. If it doesn’t show any tasks, it means the output failed. Your speaker has failed.
Check the Instability
Examine your Amplifier’s signals for any signs of instability, as this presence will almost certainly result in distortion.
Test the Signals
Connect the multimeter to the Amplifier to test the signals. If the amplifier signals are decreasing, this indicates that the Amplifier will cause distortion.
Use Multimeter

Examine the voltage output of your Amplifier. Check the voltage of the Amplifier with the multimeter. If the Amplifier turns off, you must check the voltage source.
Another possibility is that your Amplifier’s voltage is less than 10 volts. In such a case, you risk damaging your Amplifier, so have a technician inspect it. Furthermore, the Amplifier you are currently using may have poor grounding, which could be the source of your problems.
Problems with the Amplifier
Before you can learn how to repair amplifiers, you must first prepare yourself to delve into the vast amount of information available about their operation. Your Amplifier can go wrong, but some common issues will affect almost all brands and models.
Here you get to know how to identify an amplifier problem and what and how to fix it. In addition, you’ll learn how to disassemble, inspect, and clean an amplifier.
The Amplifier does not turn on
Examine the fuse as well as both sides of the battery. It is not a diagnosis that can be made by looking. You may need to adjust the fuse, inspect the remote wire, or check the voltage at the amplifier terminals. Disconnect everything and re-energize the Amplifier.
There’s a problem if it always goes into safe Mode. Returning to the secure Mode implies that the speakers have a problem. The wiring could be the culprit.
The Amplifier is in protection mode
Unplug everything and turn the Amplifier back on. There’s a problem if it always goes into defense mode. If not, make contact with your speakers. Returning to the role of security implies that the speakers have a problem. It could be the insulation.
The Amplifier is turned on but has no output.
Investigate all configurations and volume settings. You can try a different input to see where the problem is.
Distorted output
Remove all of the variables and retest all of the options. There is no other way to determine the source of the problem.
The output of the Amplifier is low.
Reduce the volume of the sound as well as the subsonic filter. Move up, then back down, and double-check the connection. The voltage drop at amp ports may also indicate a problem. The speakers must have a voltage greater than 12 volts.
The Amp has erratic power
Before turning off the Amp, turn on the device and double-check the current. If the voltage falls below 10V, go through the wires.
How to fix an amplifier?
Because they are built with similar components, repairing an amplifier is similar to repairing many other appliances. Some of the basic components are cords that may fail to deliver electricity, fuses needing replacement, and switches and controllers that may malfunction.
Before you can learn how to repair an amplifier, whether a stage or a fender, you must first understand its construction and operation; if you have the right tools, disassembling the unit is a breeze. If you cannot repair your Amplifier, you can always seek assistance from your manufacturer’s customer service or a professional. Also, if you’ve exhausted all of your repair options and the Amp still doesn’t work, you can seek professional assistance.
Conclusion
Finally, if you follow all of the above steps correctly, testing an amplifier with a multimeter will be an easy job. Remember to take precautions for your safety and the safety of one of your devices. Although different multimeters have different features, their operating principles are the same! So, you can do this job easily!